
Homemade firm Paneer with perfect texture and no crumble is always a dream for me whenever I see expensive paneer blocks in stores. I am the one who like paneer from my childhood in my family. Recently my kids joined that club and came to know their liking from the parties we ate. So I started trying paneer for gravies at home. Sometimes when we add paneer cubes to the gravy they break while boiling because of more water / moisture in it. Sometimes they won’t stick together as perfect cubes like store bought and you can see separate solids particles / malai here and there. So I am not going to add any secret ingredient here to make it thick and firm just the regular milk with few good tips works well and after trying this at home you never think
buying it out 🙂 . Do check the quick and complete video for the easy technique I followed to make this firm paneer. Also for soft paneer refer Rasgulla or Rasmalai which is always a super hit in my blog.
Tips and Notes
- Evaporating the milk to thick consistency is a must step to follow , it has to boil at least 10 minutes.
- Squeezing the water content properly once you get chenna.
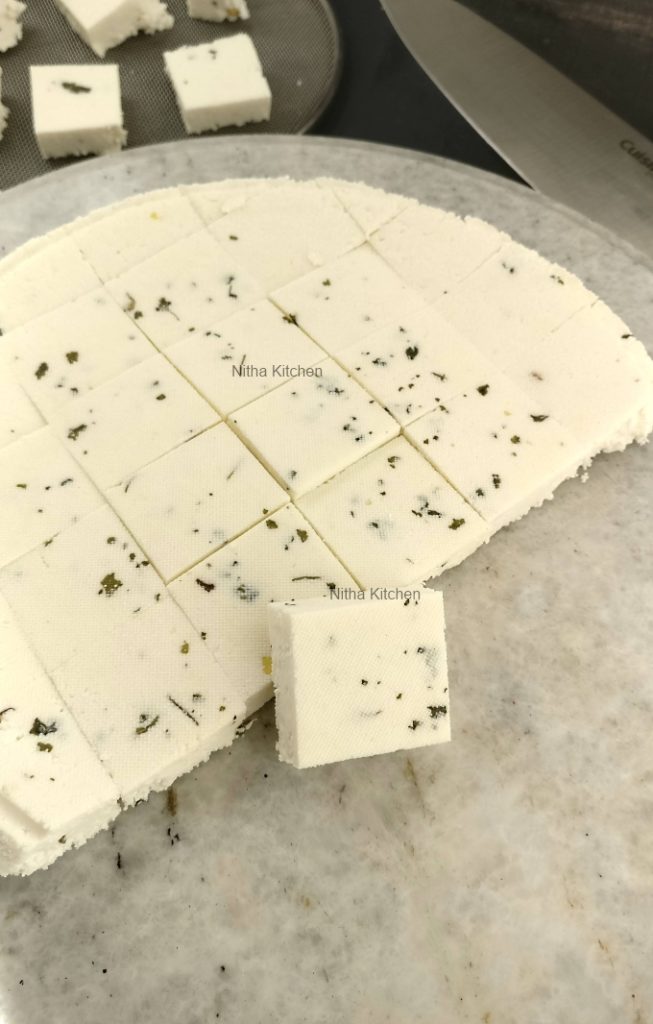
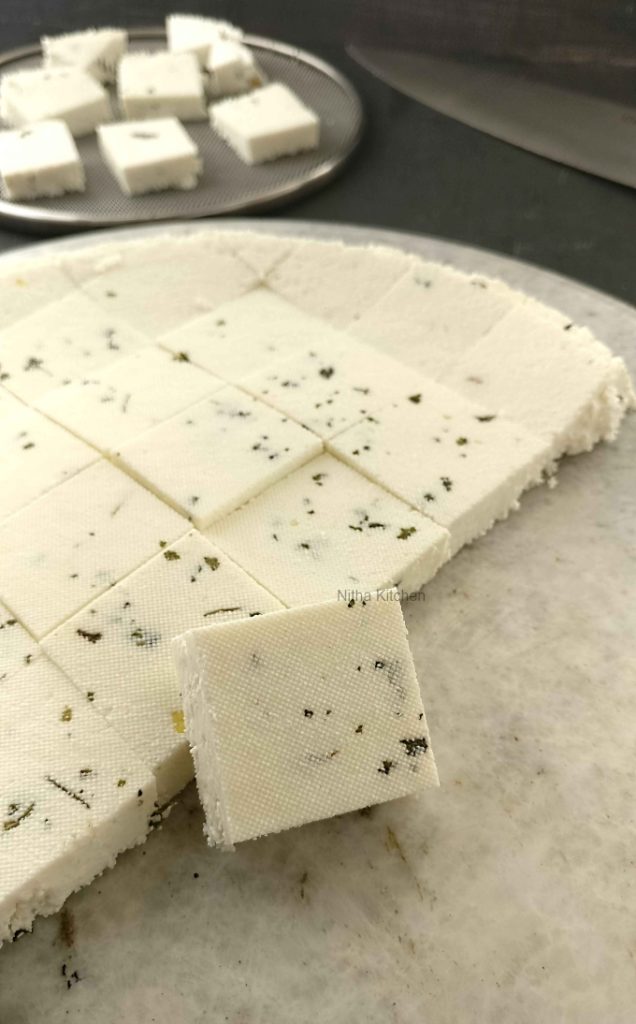
- Also when you roll the chenna with tight cloth at one place you get thick paneer and somewhere thin cubes so to attain even thickness I have used this sieve technique.
- Also when you make at home there wont be any waste imperfect shapes at last you get the satisfaction that your effort is indeed worth.
Ingredients to make Homemade Firm Paneer
Whole Milk / Full Fat Milk – 1/2 Gallon (1 Gallon – 3.78 Litres)
Lemon Juice – From 1.5 medium size lemons (or Vinegar)
Dried Methi Leaves – 1 tsp
How to make Homemade Firm Paneer
- Boil milk in a heavy bottom pan.
- Keep stirring in medium flame.
- Once the milk foams , reduce flame to low and keep cooking boiling the milk till it gets thickened.
- Say the full pan milk comes to 3/4th of the pan (this is the important step to get firm paneer).
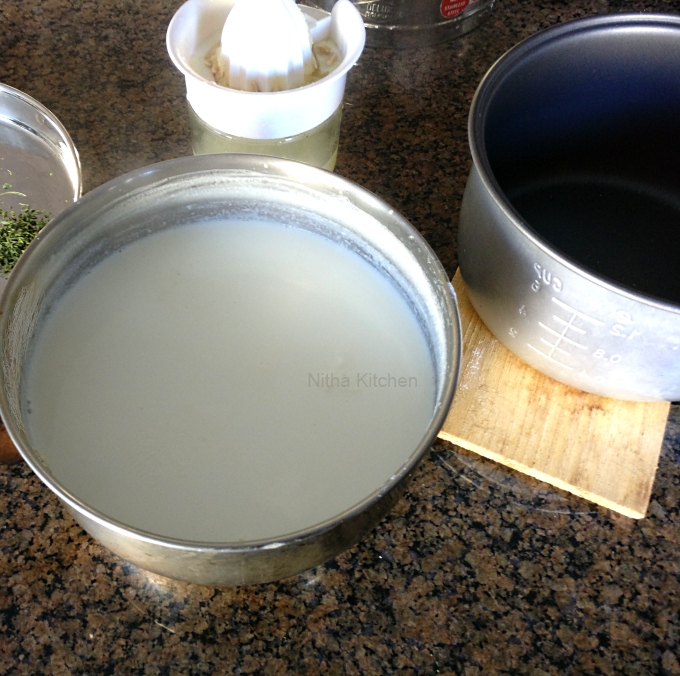
- Once done remove the pan from flame, add the prepared juice in batches and keep stirring.
- At one stage the whey and paneer separates, the milk should turn pale yellow in color.
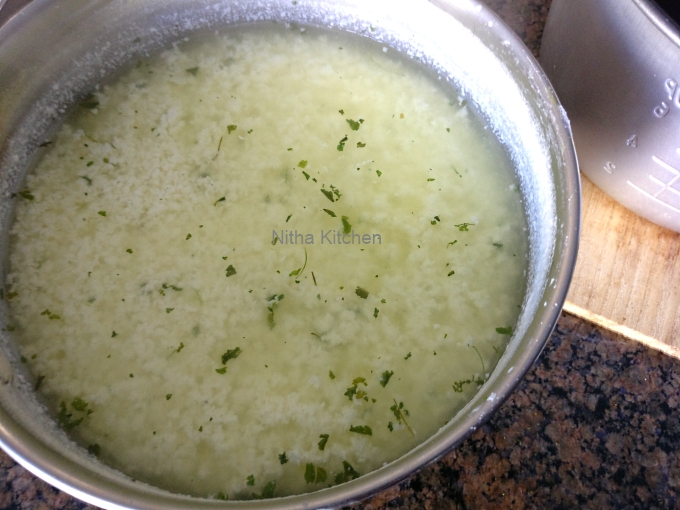
- So immediately pour the curdles mixture in to sieve/shifter with very tiny holes attachment.
- The water and paneer filters by that way, and wash the paneer under tap water once.

- So prepare a pan that fits over this sieve and fill that pan full of water.
- Keep the weight over filtered paneer for 30 minutes and also keep a plate under the sieve to grab excess whey water.
- But in that 30 minutes remove excess whey storing under sieve say 2 or 3 times.
- Later store the paneer in refrigerator for 1 hour at least before cutting in to cubes.
- Longer it stays say 3-4 hours in fridge the more firm they are.

Video Tutorial
Print Version

- Whole Milk / Full Fat Milk – 1/2 Gallon 1 Gallon – 3.78 Litres
- Lemon Juice – From 1.5 medium size lemons or Vinegar
- Dried Methi Leaves – 1 tsp
-
Boil milk in a heavy bottom pan.
-
Keep stirring in medium flame.
-
Once the milk foams , reduce flame to low and keep cooking boiling the milk till it gets thickened.
-
Say the full pan milk comes to 3/4th of the pan (this is the important step to get firm paneer).
-
Once done remove the pan from flame, add the prepared juice in batches and keep stirring.
-
At one stage the whey and paneer separates, the milk should turn pale yellow in color.
-
So immediately pour the curdles mixture in to sieve/shifter with very tiny holes attachment.
-
The water and paneer filters by that way, and wash the paneer under tap water once.
-
So prepare a pan that fits over this sieve and fill that pan full of water.
-
Keep the weight over filtered paneer for 30 minutes and also keep a plate under the sieve to grab excess whey water.
-
But in that 30 minutes remove excess whey storing under sieve say 2 or 3 times.
-
Later store the paneer in refrigerator for 1 hour at least before cutting in to cubes.
-
Longer it stays say 3-4 hours in fridge the more firm they are.
Tips and Notes
Evaporating the milk to thick consistency is a must step to follow , it has to boil at least 10 minutes.
Squeezing the water content properly once you get chenna.
Also when you roll the chenna with tight cloth at one place you get thick paneer and somewhere thin cubes so to attain even thickness I have used this sieve technique.
Also when you make at home there wont be any waste imperfect shapes at last you get the satisfaction that your effort is indeed worth.

While the text in this blog video are not cropped, in your Insta post, text get cropped in the edges .
Excellent video with full clarity is here in your blog. Thanks for the recipe, Sangeetha