
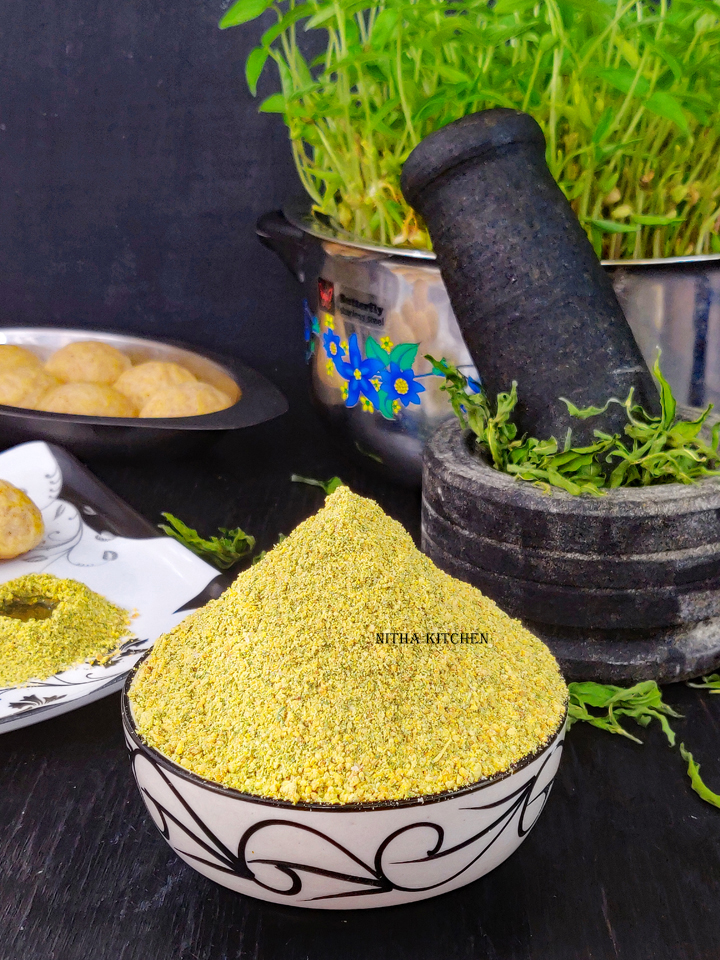
Ponnanganni Keerai Idli Podi : One fine day my opposite house neighbor gave green podi for us to taste. It’s tasted so good and spicy as well since they eat so. I thanked
for the podi, she immediately shared the recipe randomly while talking in phone. Thanks A for the healthy recipe, for a change I tried the same at home (so far 5 times in this season) with my super duper ponnanganni harvest and shared the same recipe here today.
Ponnanganni Leaves
Ponnanganni Leaves is rich in vitamin A, Beta- carotene (both are good sources for eyes health), calcium, dietary fiber, iron and vitamin C. Also its highly noted for glowing skin. Every year I get abandon yield of ponnanganni , also I share plants and stems ( usually I get more demand for this plant among friends circle).
One main dish I make often with this keerai is ponnanganni paruppu keerai masiyal since it’s all of ours favorite side dish for rice and dosa. I remember few of my friends asked how to pick the ponnanganni keerai after getting plants from me. I usually pick the leaves alone and pinch the entire tender tip. So by pinching like that it stops growing lengthy and new leaves comes back in dense from where you picked the leaves previously.
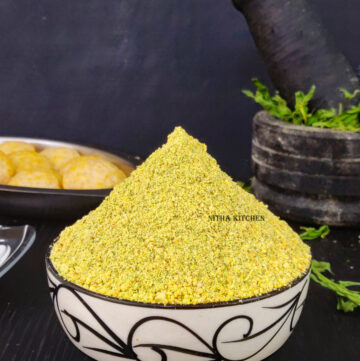
Ponnanganni Keerai Idli Podi
To make this healthy Ponnanganni Keerai Idli Podi you no need to sauté/ dry roast the dried keerai to make powder. If you live in hot place it dries up quickly. For me it took 3 days to dry under shade and I was doubtful whether it dried well or not so I just warmed in the pan before powdering.
Ponnanganni Keerai Idli Podi Preparation
- Remove any odd/pale leaves, very thick stems (Pic 1) from the picked leaves then soak them in water for a while say 20 minutes.
- Rinse at least 4 times or until the water is clear.
- Pat dry the cleaned ponnanganni leaves on a cloth and gently press to remove excess moisture (can use salad spinner).
- I stored a batch in freezer for winter use and the remaining I transferred to parchment paper (refer video for these steps) .
- I dried it under shade for 3 days and turned like shown in Pic 2 and Video at.
- The leaves won’t turn so crisp and when you break it won’t break as well since it dried under shade for just 3 days.

- Measure by pressing tightly the leaves in the measuring cup (Pic 3).
- I was doubtful whether it dried or not so I just sautéed in hot pan (Pic 4) less than a minute to warm it up.
- To the same pan add oil, saute chana dal for first 2 minutes.
- Then add red chilis to it and continue sautéing till dal turns golden brown (Pic 5).
- Remove the dal and chili mixture and place it over kitchen towel to absorb excess oil.
- To the same pan add urad dal (I didn’t add oil but if you wish add few drops).
- Saute the dal and once it changes golden brown, switch off the flame.
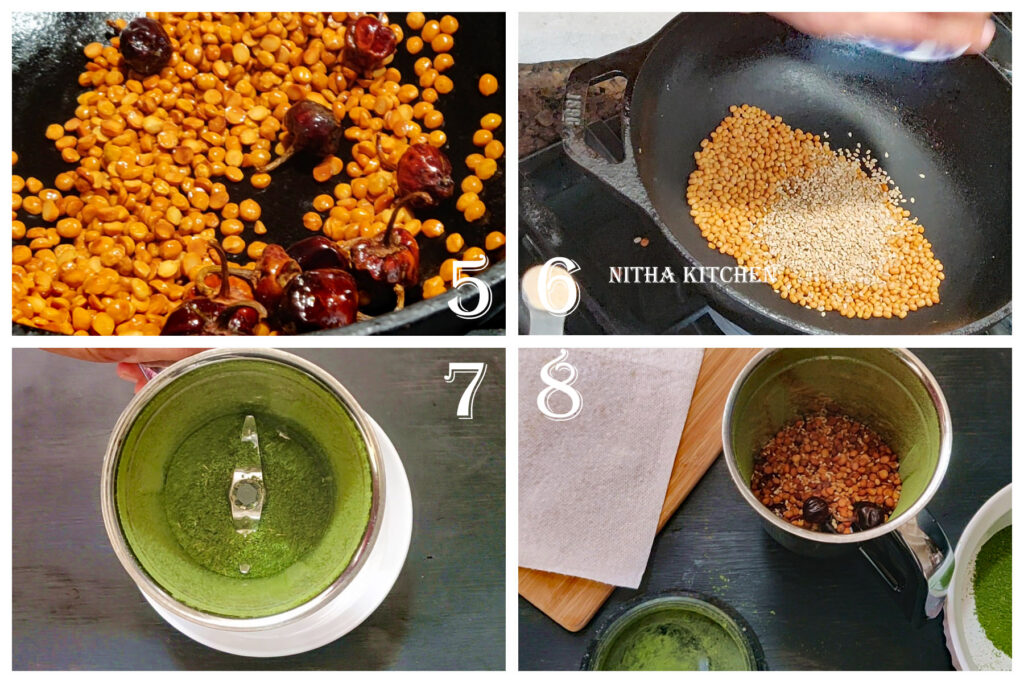
- Add sesame seed to it (Pic 6) and saute a while, I used roasted sesame so the heat retained in the cast iron pan after it switched off was enough for me to warm it up.
- If using unroasted sesame seeds roast them first in the dry pan till it changes color then add oil and roast the dals.
- Let all the roasted ingredients cool completely before grind.
- First grind the dried leaves to nice powder (Pic 7).
- Later grind dal and chilis in batches (Pic 8 & 10).
- Also grind dal to coarse texture which tastes good and we love that crunchiness in each bite (Pic 9).

- Mix the ground stuff with salt (Pic 11) and hing powder (Pic 12).
- I made a small batch that stays good for us for a week minimum.
- If making a big batch do add salt whenever necessary.
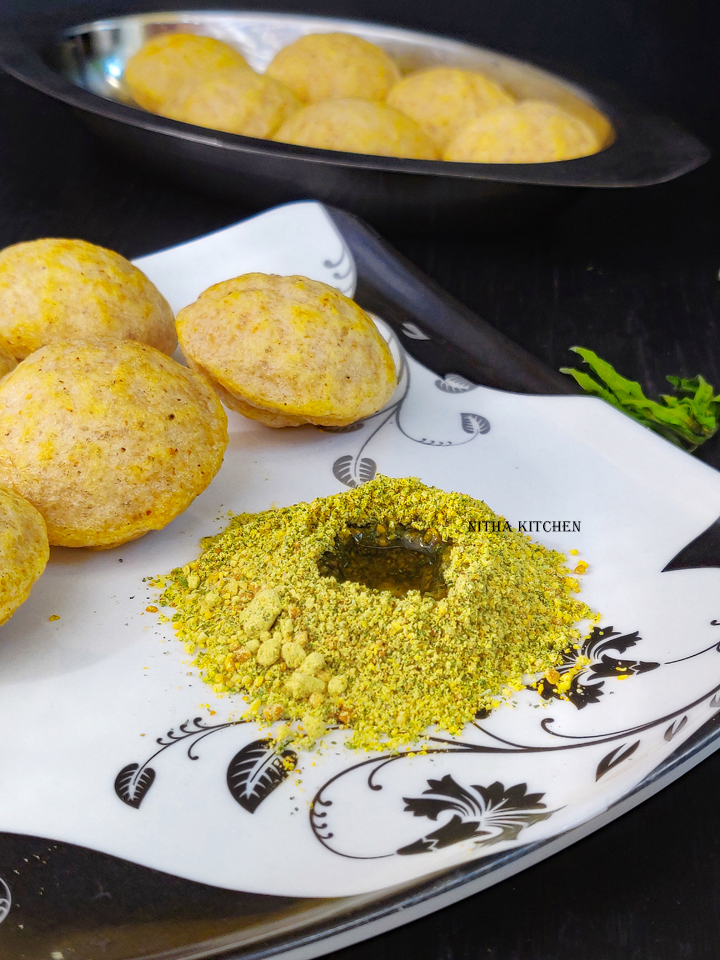
- Also this ponnanganni keerai idli podi tastes good with rice and ghee combo.
Video Tutorial
Ponnanganni Keerai Idli Podi Print Recipe
Learn to make healthy Ponnanganni Keerai Idli Podi
- 1.5 Cup Dried Ponnanganni tightly pressed
- 3/4 Cup Chana Dal
- 1/2 Cup Urad Dal
- 1/4 Cup Sesame Seeds
- 10-12 Numbers Red chili
- 1/4 tsp Hing
- Salt – As Needed
-
Remove any odd/pale leaves, very thick stems (Pic 1) from the picked leaves then soak them in water for a while say 20 minutes.
-
Rinse at least 4 times or until the water is clear.
-
Pat dry the cleaned ponnanganni leaves on a cloth and gently press to remove excess moisture (can use salad spinner).
-
I stored a batch in freezer for winter use and the remaining I transferred to parchment paper (refer video for these steps) .
-
I dried it under shade for 3 days and turned like shown in Pic 2 and Video at.
-
The leaves won’t turn so crisp and when you break it won’t break as well since it dried under shade for just 3 days.
-
Measure by pressing tightly the leaves in the measuring cup (Pic 3).
-
I just warmed the dried leaves a minute in hot pan (Pic 4) before sautéing the other ingredients.
-
To the same pan add oil, saute chana dal for first 2 minutes.
-
Then add red chilis to it and continue sautéing till dal turns golden brown (Pic 5).
-
Remove the dal and chili mixture and place it over kitchen towel to absorb excess oil.
-
To the same pan add urad dal (I didn’t add oil but if you wish add few drops).
-
Saute the dal and once it changes golden brown, switch off the flame.
-
Add sesame seed to it (Pic 6) and saute a while, I used roasted sesame so the heat retained in the cast iron pan after it switched off was enough for me to warm it up.
-
If using unroasted sesame seeds roast them first in the dry pan till it changes color then add oil and roast the dals.
-
Let all the roasted ingredients cool completely before grind.
-
First grind the dried leaves to nice powder (Pic 7).
-
Later grind dal and chilis in batches (Pic 8 & 10).
-
Also grind dal to coarse texture which tastes good and we love that crunchiness in each bite (Pic 9).
-
Mix the ground stuff with salt (Pic 11) and hing powder (Pic 12).
-
I made a small batch that stays good for us for a week minimum.
-
If making a big batch do add salt whenever necessary.
-
Also this podi tastes good with rice and ghee combo.
This is my second recipe post for my own series “Recipes From My Garden Fresh Produce”. Here are the collection of posts for this series.
Leave a Reply