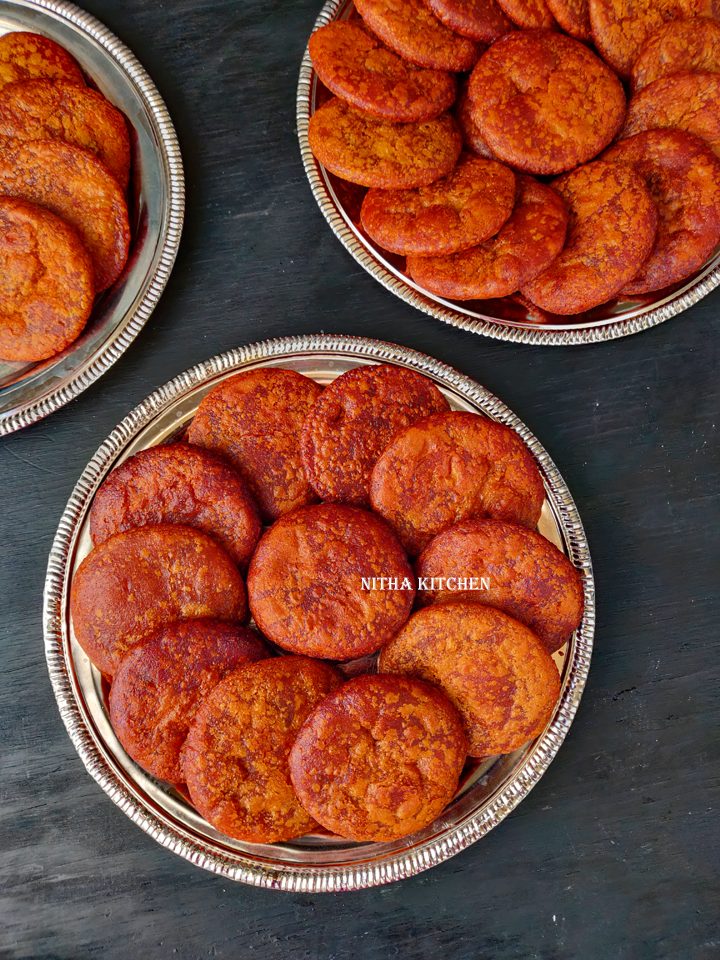
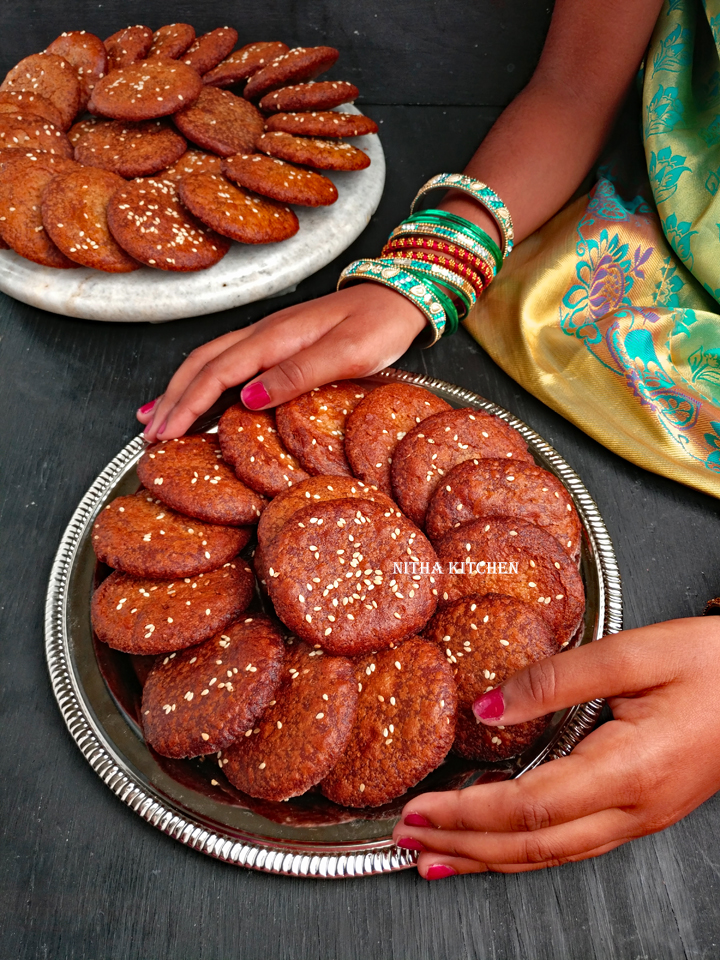
I make Adhirasam at least 4 times in a year since kids love it to core and also send it to school snack as well. In recent years I switched to Karupatti (Palm Jaggery) or Nattu Sarkarai / Brown Sugar) for regular coffee/tea, sweets and also in baking. Since Adhirasam is our family favorite its not an exception from it, so Karupatti Adhirasam is trending in our family now :-). I bring whole Karupatti / Palm jaggery from my native place
and using it so…Each karupatti weighs around 1 kg but worth carrying it :-). Also the easy breaking tip is break with hammer as shown in the video in to small pieces. I personally noticed many health benefits especially for women after using karupatti in everyday cooking. I have posted few recipes using karupatti / palm jaggery as a base and yet to post many healthy recipes with it.
Amma always make Nattu Sarkarai or Karupatti Adhirasam and now I am following her after bringing Karupatti to US. So in my suttufying (making) experience I feel that Nattu Sarkarai / brown sugar or Karupatti / palm jaggery based adhirasam turns super soft and puffy compared to jaggery based ones.
With the jaggery techniques I showed here which was taught my mom , my adhirasams never had hard dough or dissolving in oil issues. Everytime they turned out in good shape and one or two times crispy because of jaggery and oil I used during initial days.
Ingredients
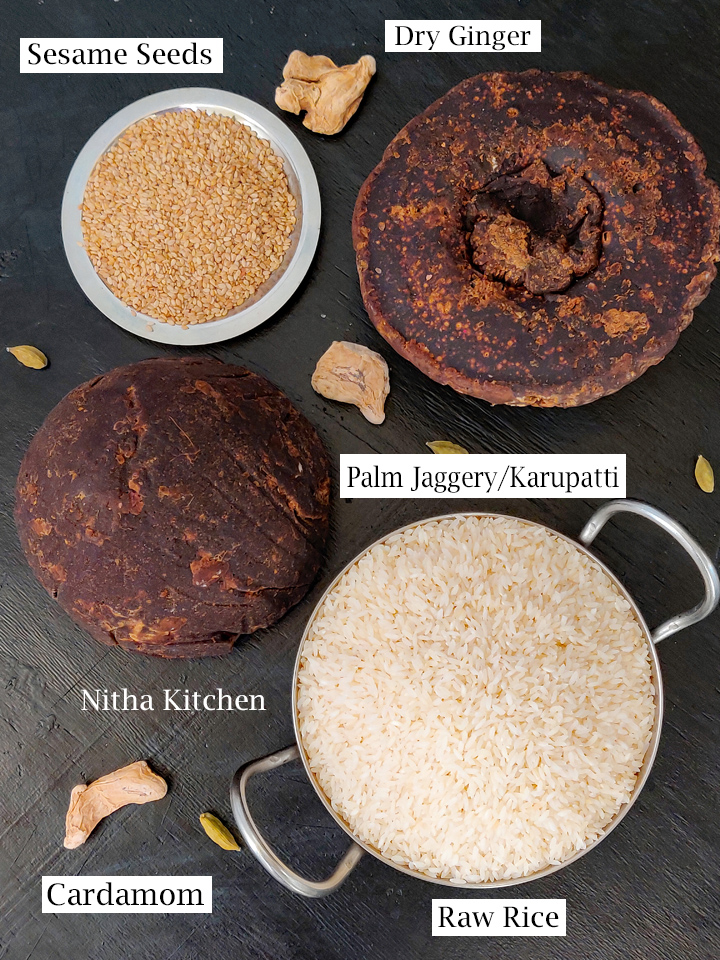
Raw Rice / Adhirasam Arisi or Pachai Arisi – 500gms (2.5 cups approx)
Palm Jaggery / Karupatti/ Powder Jaggery – 500gms (2 cups approx)
Cardamom Powder, powdered with sugar – 2 Tbsp
Dry Ginger – Optional (If using karupatti skip it)
Oil / Ghee – As needed to fry
Few Karupatti Recipes
Sukku Malli Karupatti Kaapi (Traditional Vegan Herbal Coffee)
Gur Peda / Karupatti Palkova (Coming up next)
Karupatti Adhirasam
Thinai Karupatti Urundai | Foxtail Millet Taar Gur Ladoo
Adhirasam / Ariselu Recipes
- Jaggery Adhirasam soft and crisp ariselu versions
- How to choose Right Jaggery for Adhirasam
- Authentic Brown Sugar Nattu Sarkarai Adhirasam
- Karupatti Adhirasam
- Super Soft Adhirasam for Beginners
- Thinai / Foxtail Millet Adhirasam
Karupatti Adhirasam Recipe Highlights
- Make fresh rice flour and don’t use instant store based rice flour.
- Don’t dry fry the flour, it needs moisture while mixing with jaggery syrup.
- Coming to Rice, Raw rice or Sona masoori rice or Adhirasam Rice are good. Maavu rice or Adhirasam rice looks similar to idli rice they are so soft and available in kongu region.
- Use small hole sieve to sift the flour for soft adhirasam.
- After sifting each batch of rice flour press tight to retain the moisture.
- Brown Sugar needs less water to melt but palm jaggery needs the water quantity as mentioned in the recipe.
- I have mentioned to methods to check the string conssitency one is very easy for beginners (refer video).
- Little crack in the dough is ok, when it cooks in hot oil, jaggery melts and turns puffy, soft and perfect adhirasam.
- Always heat the oil well before dropping the flattened adhirasam dough.
- Once they puff up do reduce the temperature this way the inner dough cooks and the outer layer turns gorgeous brown.
- Add necessary oil as shown in video, can make more than one at a time but do concentrate more otherwise they turn black quickly.
How to make Raw Rice Flour
- Soak raw rice or adhirasam rice/maavu arisi for 2 hours.
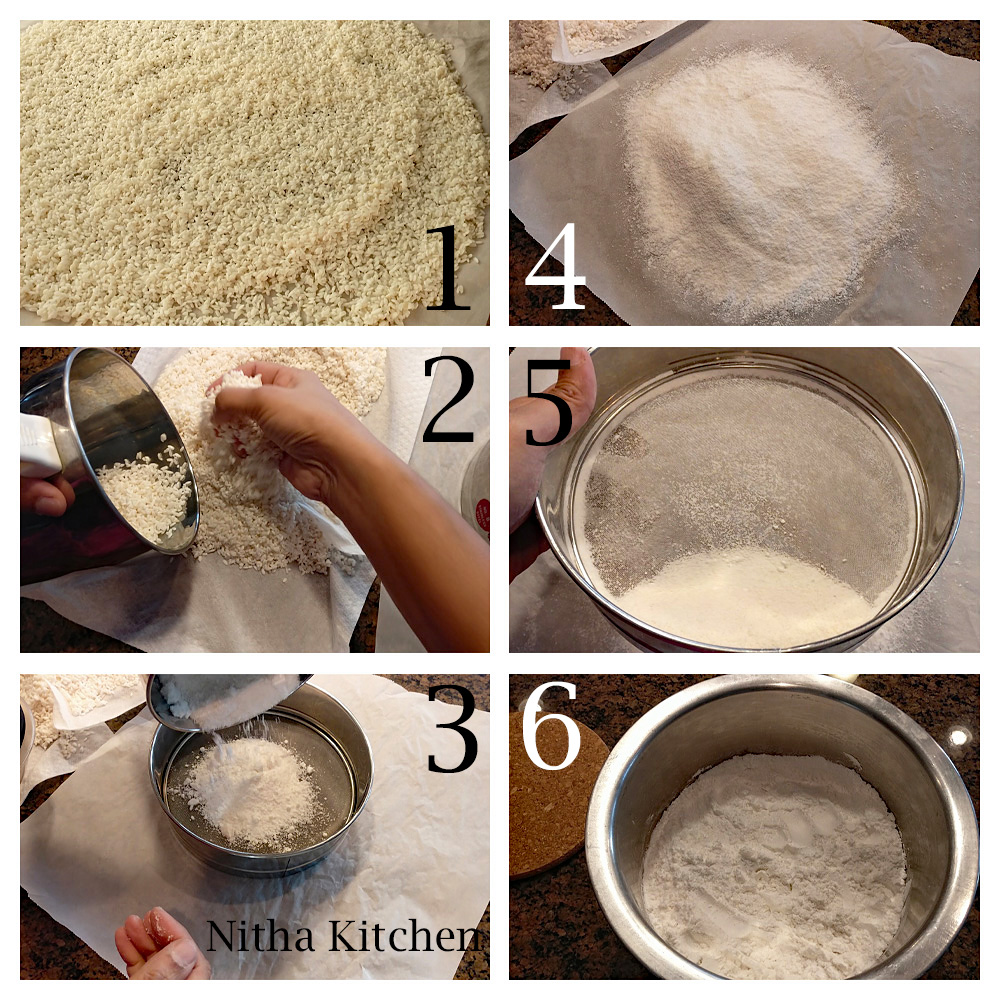
- Later drain the excess water, pat dry over cloth for 30 minutes (Pic 1).
- It still needs to be wet, grind the rice in batches and 2 cups rice yields 4 cups of flour.
- Do grind them in batches, approx 4 batches also at any cost don’t heat the flour while grinding.
- For that add a portion of moist rice into mixie jar (Pic 2).
- Grind fraction of seconds , raw rice turns to flour quickly so dont over run the mixie.
- Pour the ground rice in sieve placed over parchment paper to sift (Pic 3).
- Sieve the flour immediately after grinding it (Pic 4).
- So when you have unfiltered coarse rice (leftovers, Pic 5) you can include it in the next batch of grinding (refer video).
- Do use small hole sieve to make soft adhirasam if you use big hole sieve you get crispy adhirasam.
- Once done with preparing rice flour add it to the mixing bowl (Pic 6).
- Press it tightly till you prepare the jaggery/sugar syrup so that you can retain moisture in the flour.
- If you make the flour ahead of time wrap it tightly and store in the refrigerator not more than a day.
- Due to moisture in the flour molds form so I won’t recommend storing the flour in the fridge for a longer time but wanted to clear the followers queries.
- Also never ever dry roast the rice flour for the adhirasam recipe.
- You can freeze powdered rice flour and store in an air tight container.
- Thaw properly before adding the hot syrup to make adhirasam.
Jaggery Syrup Preparation
- Measure the palm jaggery or Natural unrefined Sugar (Naatu sarkarai).
- Add 1.25 Cup of water to it if using palm jaggery (pic 1), other powdered version needs 1 cup water.
- Palm jaggery needs more water to dissolve/melt compared to any powder form jaggery varieties.
- In medium flame boil, you can filter it once palm sugar gets dissolved and bring it to boil again.
- Add cardamom powder to it (Pic 2).
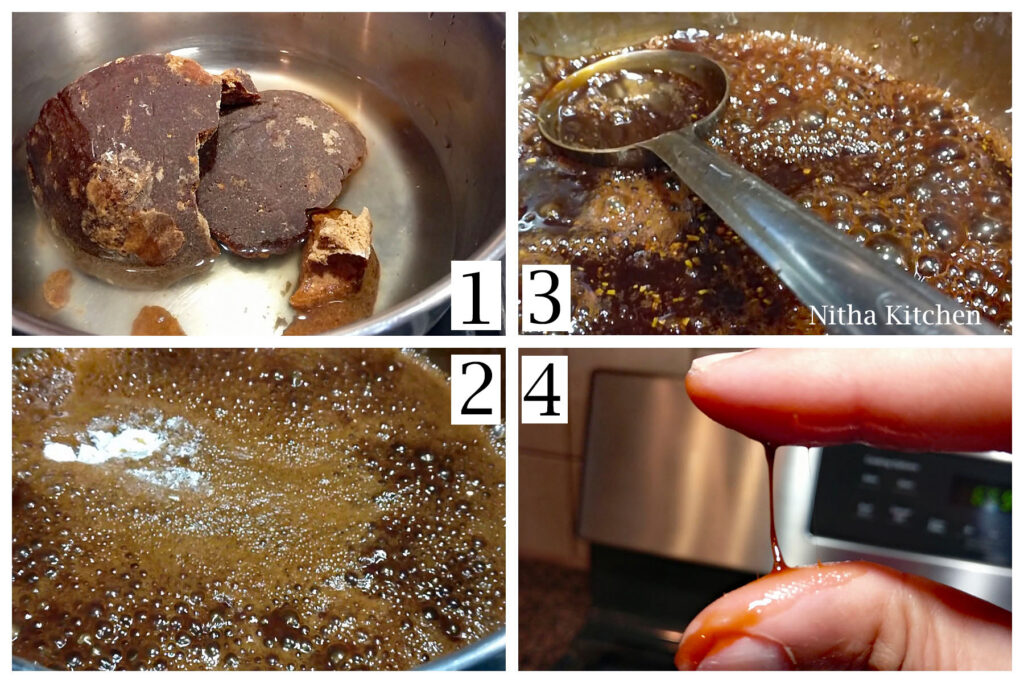
- In 5 minutes (approx) you will get foam from the syrup (Pic 3) and start testing for the consistency.
- For that take water in a small cup add few drops of jaggery syrup, if it is in right consistency the jaggery should stand separate from water and when you rub it with your finger you can see an impression there (anyways the syrup should not dissolve with water, refer video).
- Or check for string consistency as shown in Picture 4 or in the video tutorial.
Mixing Part
- Immediately pour the hot syrup over prepared rice flour (Pic 1) and mix it properly.
- Beginners do reserve few tbsps of jaggery and rice flour before mixing together. That way you can finally adjust to right consistency.
- Do check the Video how I mix the batter, if at any point you are not attaining this consistency and if the batter is tight add more reserved syrup on the same hand if the batter is gooey add more reserved rice flour, add a tsp at a time.
- Initially the batter should flow like folding ribbon (Pic 2), So this is the right consistency.
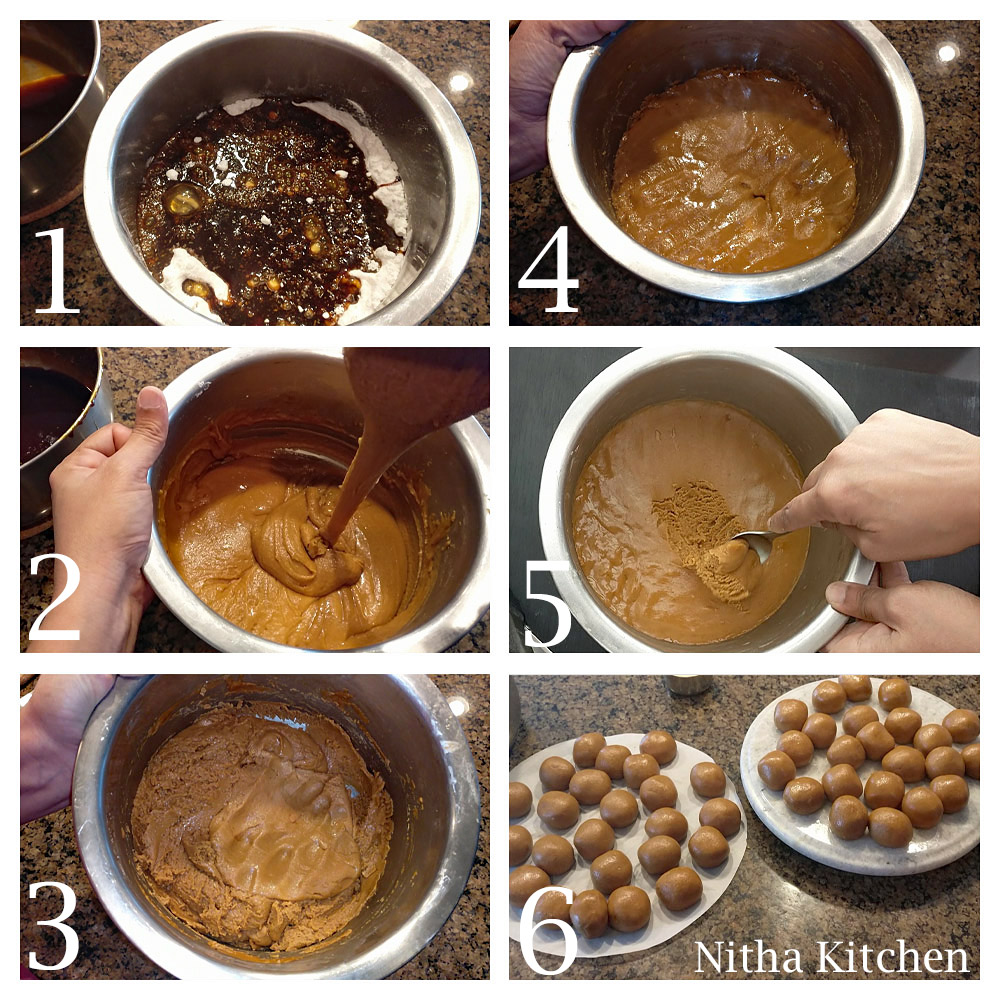
- And slowly syrup gets absorbed and becomes thick dough (Pic 3).
- Keep stirring for few minutes say 5-8 minutes so that the heat evaporates quickly.
- Leave the dough uncovered for the batter to cool off, also scrape the sides and keep it clean (Pic 4).
- Either leave the dough little open so that after 8 hours of fermentation it turns to perfect adhirasam maavu OR
- Once cooled down completely cover/seal it well and let rest in room temperature for over night to 5 days maximum.
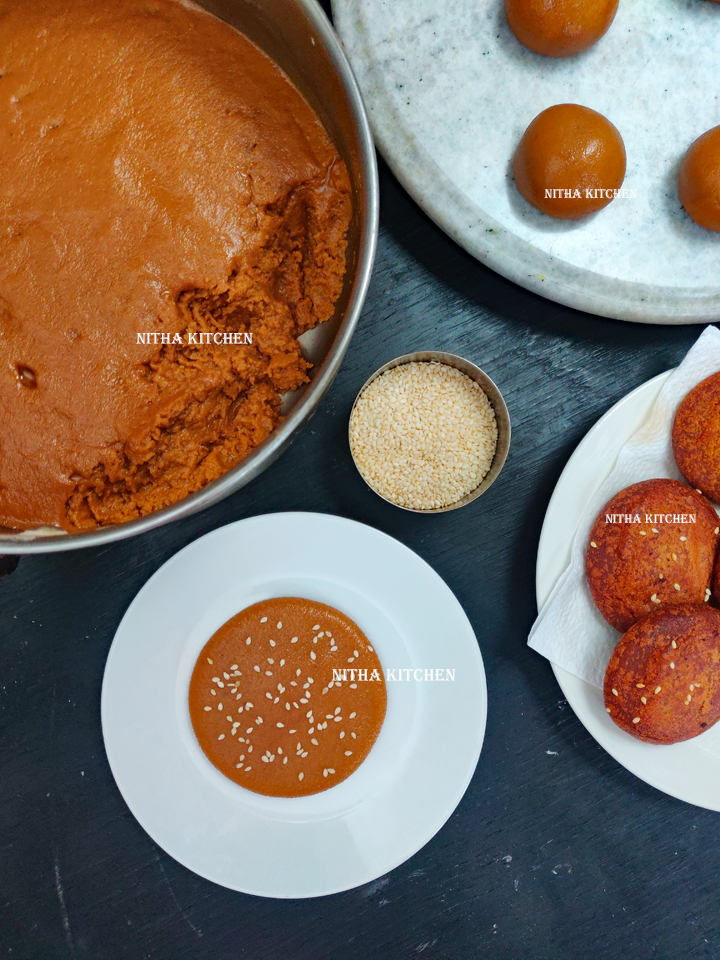
- Once fermented the excess moisture gets absorbed and looks perfect like shown in Picture 5.
- Make equal size balls from the dough when you are ready to fry (Pic 6).
Frying Part
- Take a plate/ziploc sheet grease with oil, take a ball and flat over it to round shape with medium thickness (Pic 1) for soft athirasam.
- Once you start flatting each balls to round shape simultaneously heat oil in a wok.
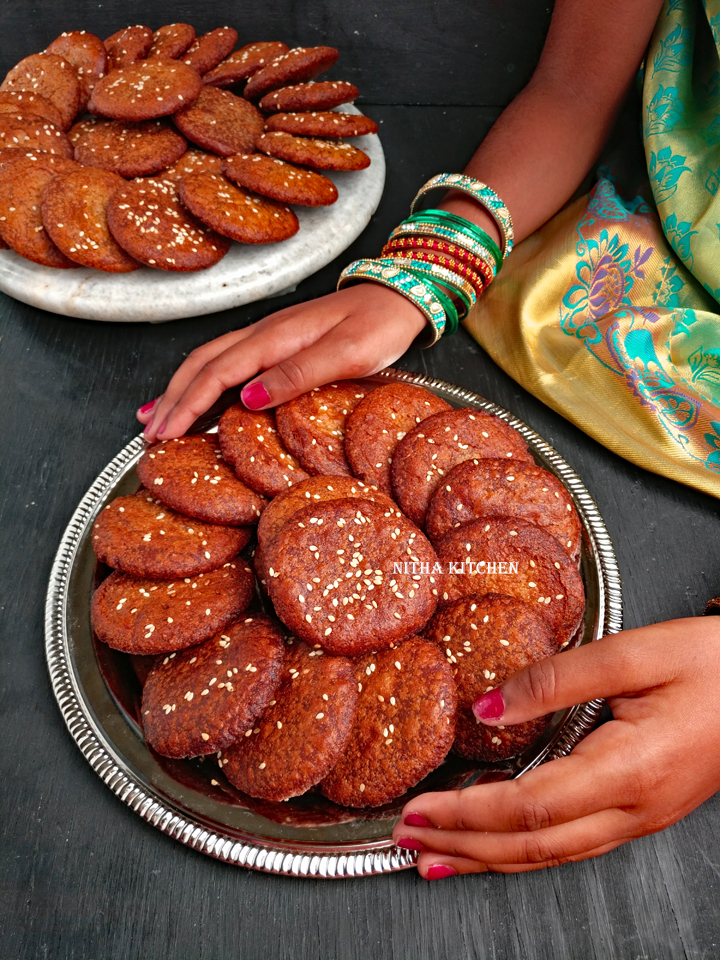
- You can top up with sesame seeds as shown in picture above, also you can make adhirasam with hole in the center or not.
- Here the frying temperature is also one main important thing to note.
- The oil should not be too hot nor too low in temperature, In medium flame you have to fry it.
- Too hot temperature makes the athirasam to turn golden brown quick and inside won’t cook properly.
- The low temparature makes the athirasam to turn hard and crisp.
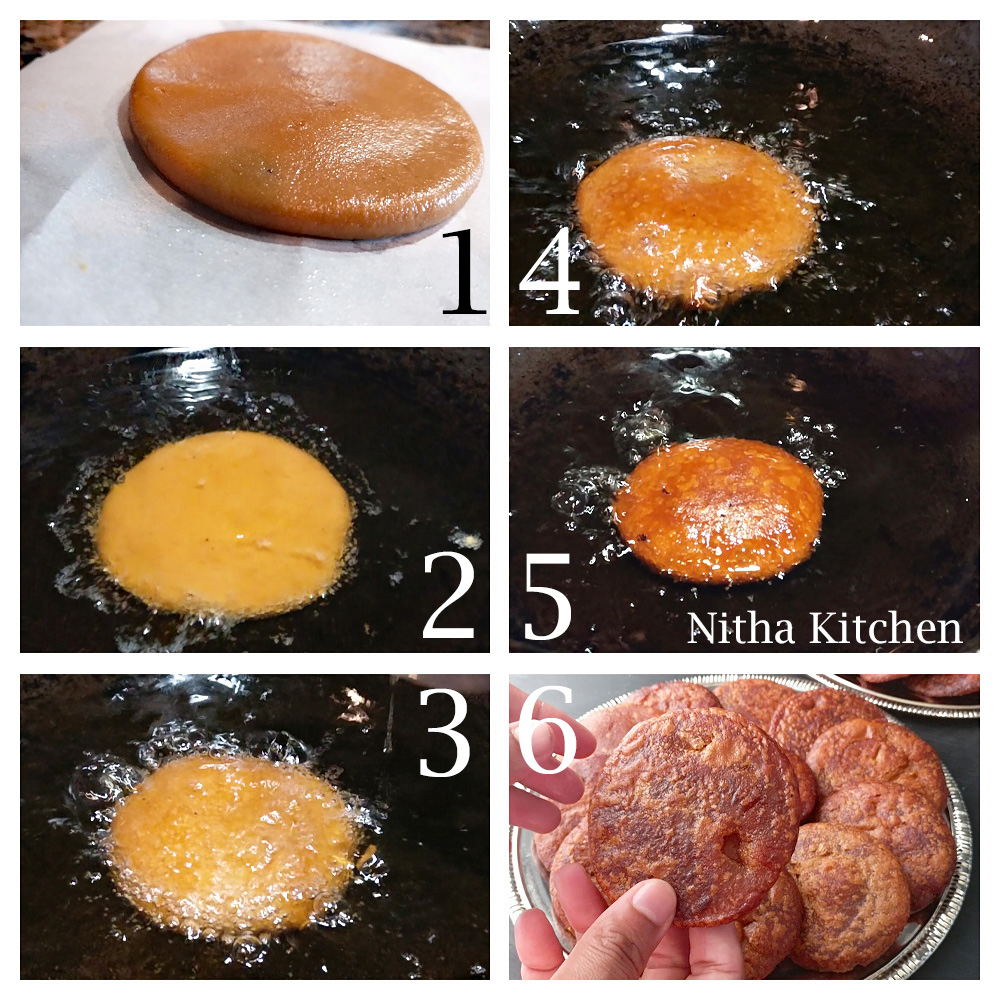
- So maintain a right temperature (while adding the raw athirasam (Pic 2) the oil should be bit hot later reduce the temperature), add one at a time when one starts puffing up (Pic 3) you can add the next one.
- The puffing athirasam is the right indication.
- Flip the adhirasam and fry by pouring oil over it using ladle (Pic 4 & 5)
- Once it reaches golden brown (Pic 5), take it out from the oil.
- If interested press it gently between two spatulas (pic 6 is the pressed one) to drain the excess oil.
- If you are keeping it for longer days do keep some oil in the adhirasam.
- Also wipe it all over adhirasam using kitchen paper towel to remove excess oil around and keep aside in a plate.
- Once cooled down completely store in an air tight container at room temperature.
- Depends on the nature of oil, may turn light crisp immediately after frying ie the first day but later it turns soft.
- When properly stored adhirasam stays fresh and good for a month at room temperature 🙂
Karupatti Adhirasam Video Tutorial
Karupatti Adhirasam Making Tips
- I never had experience of split adhirasam in oil but I heard from my mom that if the jaggery consistency went wrong then it happens.
- Always reserve 1/4 cup jaggery syrup and few tbsp ground flour to adjust consistency later.
- If you don’t have raw rice flour and the batter is gooey do add instant rice flour 1 or 2 tsp not more than that OR
- Stir the adhirasam batter over stove in low flame for a while without burning the dough (this tip definitely works).
- Make sure the repaired dough sits on room temperature for 8 hours at least before the deep fry.
- You can store the Athirasam dough in an air tight container in refrigerator for more than a month.
- When you are about to deep fry take the dough as needed keep it out at room temperature for 1 hour at least before frying.
- If the dough is too hard add few drops of milk, mix it and make balls, flat it round, then fry them in oil as mentioned above.
- Also you can make a small batch of jaggery syrup then mix with hard dough, leave it for 1 hour and then fry it.
- Add hot syrup to the ground rice and the rice flour cooks in it and it forms bubbles while mixing which its normal.
- The adhirasam dough can be stored in room temperature for up to 7 days in winter and 5 days in summer when handled properly.
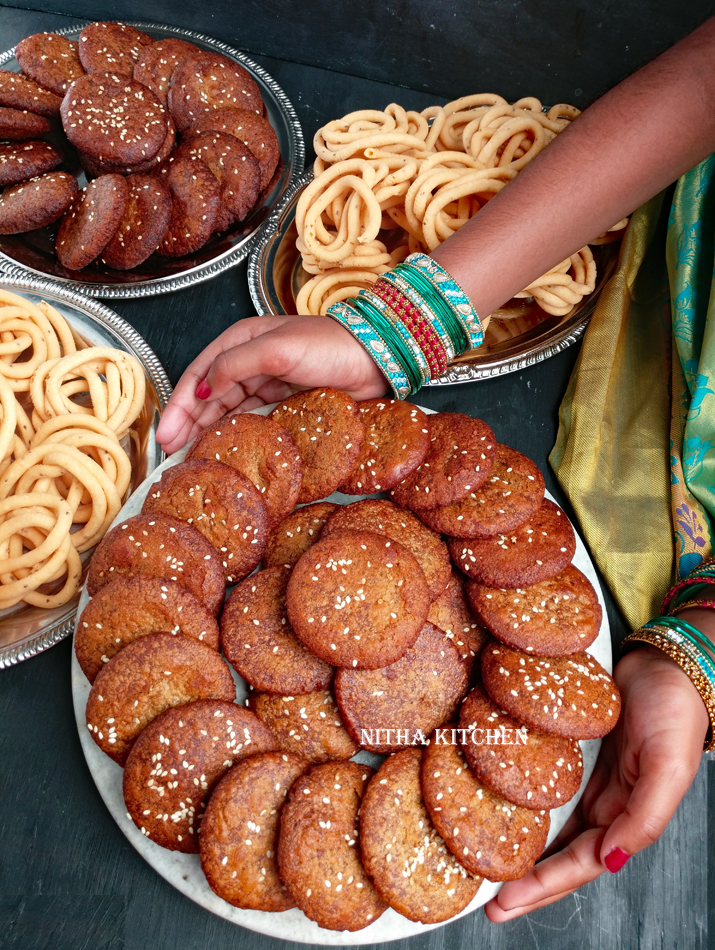
[…] or Brown Sugar / Nattu Sarkarai or Karupatti- 2 Cups (My mom make karupatti adhirasam you can see in my Insta […]