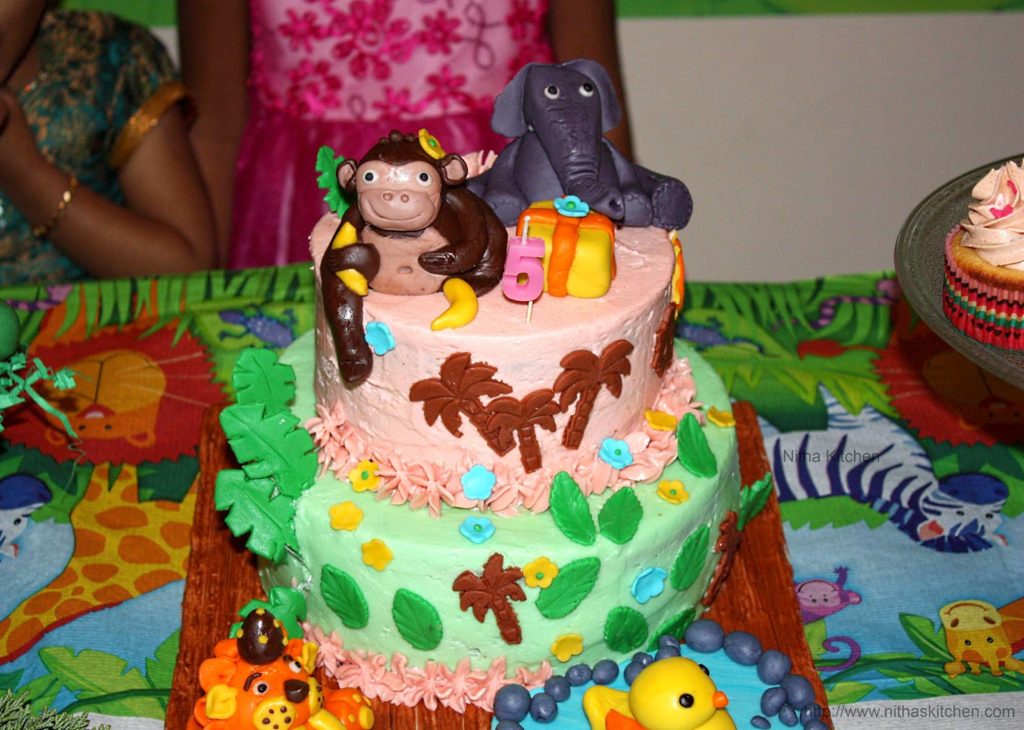
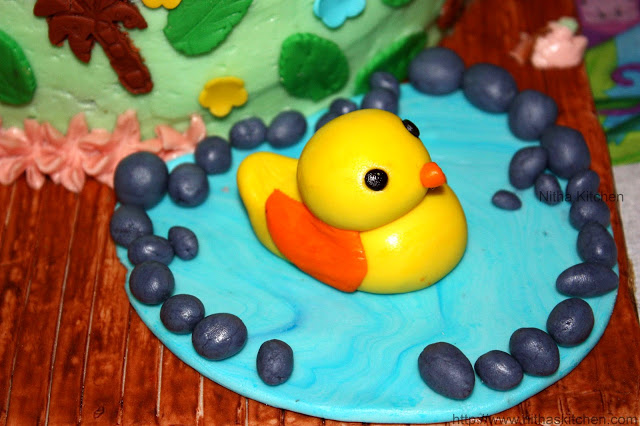
Recently I made Jungle theme cake for my daughter who turned 5, before coming to the main cake post I would like to make a separate post about the fondant work in the cake. The cake cutting happened in the evening so I couldn’t find time to click the cake in natural light, though I am happy that I was able to click the fondant characters later. I choose homemade marshmallow fondant, btw 2 years back I shared my first marshmallow fondant cake and this is my next attempt with fondants.
Ingredients
1 Lb or 16 oz marshmallow packet (use mini white marshmallows for better result)
Confectionery Sugar – 2 Pounds (8 Cups)
Water – 2-3 Tbsp
Veg Shortening – As Needed
Food Colors – As Needed (I use Ameri Color and Wilton)
Cornstarch – As Needed
How to make Marshmallow Fondants (MMF)
- Grease the counter top/platform with shortening and pour half of the sugar.
- Grease the glass bowl with shortening and add marshmallows and water.
- Give a nice stir and microwave on and off remove and give gentle stir.
- In 1-2 minutes they almost melt.
- Take it out mix well so all the marshmallows melt completely.
- Now pour remaining sugar in to it, mix well, reserve 1 cup for later use.
- Pour the melted marshmallows over sugar placed platform, apply shortening to your hands and knead well till you attain non sticky dough consistency.
- When the dough sticks to your hand and runny then add more sugar.
- If the dough is hard but little sticky then add shortening to it.
- Keep it aside for couple of hours before working with fondant. Otherwise make it a day or more in advance and refrigerate.
- You can bring to room temperature 1 hour before working with it.
I then wrapped each with cling film and sealed in a ziploc bag.
Pic 1 Coloring the fondant with orange gel color.
Pic 2 I applied chocolate brown color to small portion of white fondant, later i mixed a drop of black color to get dark brown color this color suits Monkey and Teddy Bear.
Initially I made a sitting monkey later I changed one leg to hang over the cake as shown in final picture.
How to make Monkey Figurine
- Since monkey is my daughter favorite after completing elephant i started making it.
- Roll the dough in to hollow and insert a tooth pick in to it.
- Using cookie cutter (Pic 3) or with knife make a inverted “U” shaped for the tummy.
- Place it over the body of monkey (Pic 4) and in the center make an impression/hole to indicate belly.
- Makes the arms and legs (Pic 4) by watching the Youtube video and make some finger marks (Pic 5).
- Also attach the head when you feel the body part is dried and stiff enough to hold the head.
- You may leave the body part over night or at least few hours before attaching the head, otherwise the body shape may change and you have to work on it again.
- Then coming to face part after making round face, use heart shape cookie cutter, just take first half (Pic 6) of them and paste over the face as shown in Pic 7.
- For mouth use two small semi circles, attach both and paste it below the already pasted one Pic 7.
- Make eyes and two indications for nose and using cookie cutter make a smiley for mouth.
- Also do the ears by attaching to small circles of different colors.
- For Bananas check this video.
How to Make Lion
- In Picture 8 above using small circles making decoration for Lion’s top of the head.
- In below picture I was working with lion eyes, you can notice a birthday cone on top of his head and almost it is completed.
I just followed this video for Elephant fondant.
Making Duck Fondant is one easy task among all, you can check this video for better idea.
- Next group of pictures are the palm leaves i made for jungle, though i don’t have floral wires and tapes i just used some other craft wires.
- Using medium size circle/round cutter make semi circles and cut as shown in picture 1.
- Over the edged cut/trim it to give palm leaves effect (Pic 2).
- I placed the wire at the back and covered/sealed with another small fondant as shown in pic 3.
- I allowed 2 days (1 day is enough) to dry them completely, In picture 4 you can see completed monkey and few leaves, also used leaf cutter to get some more leaves.
- After that you have to join the dried leaves with tape and place it over the brown palm tree i made in picture 5.
- But at last minute i couldn’t find time to attach those so i just simple inserted all those leaves over the cake.
- Picture 5 shows some coconut trees (using cookie cutter), base for palm tree and sun etc.
Next few pictures are Whale fondant pictorials which i made few month back for a little one’s first birthday party, Finally I used them as cupcake toppers.
- Pic 1 Use the snowman cookie cutter to make perfect tails.
- Pic 2 Trim those back part alone.
- Pic 3 Use some fork or fondant tools to make slits over the tail of Whale as shown in picture.
- Pic 4 Make eyes as shown and mouth too.
- Pic 5 21 cute toppers are ready to go over cupcakes 🙂
- For video tutorial click here.

Storing Tips
- Once the characters are dried and firm store in an air tight container at room temparature for almost one week.
- Store in a dark and cool place.
- Whenever needed apply little cornstarch or if you get tylose powder in your place do try it to make the fondant stiff.


Theres lots of recipes in net and everyone mostly they use Tyclose powder (Gum Powder). I was finding it difficult to get it. But luckily I found ur site and all the ingredients is easy to get in the local market. Thanks for sharing the recipes
Its my pleasure Sunitha 🙂
Wow cute, looks beautiful,thanks for sharing
superb and loved the step by step dear..need lots of patience nah 🙂
Amazing dear
wow…very cute…well done…
Looks so cute!
Awesome post!
Wow super idea
chanceee illa,sema….thxs for sharing it!!
Awesome!!!
Nice and cute fondant sss
Thanks a lot for your detailed post ..fondants Looks fantastic!& belated birthday wishes to your daughter.